Welcome to the 2nd part of a 3-part tutorial on making your own culottes from scratch! See Part 1 - Drafting the Pattern here. This post will discuss choosing the appropriate fabric for the project, and how to lay your pattern pieces and cut the fabric. Lets get started!
Step 1) Choose your fabric
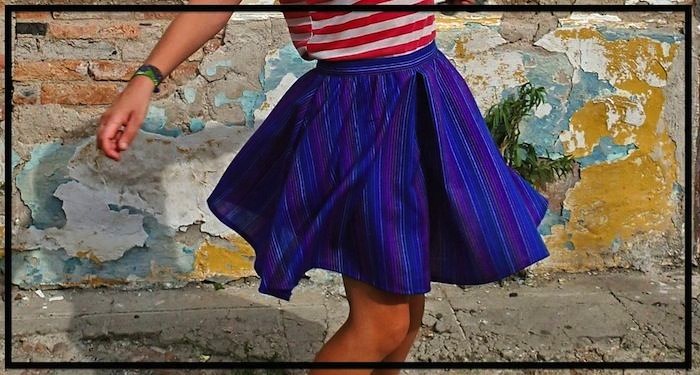
The best fabric for these culottes is a mid to light weight woven that has a nice drape to it. If it is wrinkle resistant, even better. My fabric is not, but that's ok. Give the fabric a shake… does it move and flow nicely like a flag in the breeze? Good. Does it hang stiffly or make a crinkling noise? Not as good. While you could use fabric like this, it will make your culottes rigid and tent out more. When choosing your fabric, think more like bed sheets, less like blanket… more like blouse, less like jeans.
You can also use a knit like jersey (what T-shirts are made out of), but I would steer away from anything with spandex because it is difficult to manage with a home machine. Rayon jersey would be perfect. You have to be careful when sewing a knit because it wants to stretch while you are sewing, but a great benefit is that you don't have to finish any seam allowances with overlock or zigzag because it won't fray!
A word about prints. Narrow stripes, or all over prints OK. Wide stripes and directional prints (prints that have a clear upside) are not recommended.
To figure out how much you need, review the following steps for laying the pattern out. Then take your pattern with you to the store. Before they cut the fabric for you, lay out your pattern pieces. Fabrics come in different widths so it is very difficult to figure this out before you see it. Don't be shy. The employees at the fabric store are used to creative-types with a need to visualize everything spending hours in the store pulling and draping and laying out fabrics. They understand your need to get it right and will gladly help. When in doubt, buy an extra yard or two.
While at the store, you might as well go ahead and pick up the skirt closure you want (a button and cord for a loop, or a hook and eye, or a large snap, or some cord for a tie). I'll talk more about this in the next post.
Step 2) Gather Supplies
You need:
-Pattern pieces
-fabric
-pins
-scissors
-tape
-Pattern pieces
-fabric
-pins
-scissors
-tape
STEP 3) Lay your pattern pieces on the fabric
| Pin your pattern pieces to your fabric. Here is how mine are laid out. I am using about 80" of fabric that is 31" wide. It is folded in half with the fold at the top edge. So all pieces will be cut out two layers at a time. Things to note when laying out your pieces: a) place all vertical lines in your pattern (such as CF & CB) along the straight grain. The straight grain is the long direction in which the fabric is woven... the direction of the "length" of the fabric, from cut edge to cut edge. This is best practice for fit and drape, but if you want the print of your garment to look differently, it is ok to place it along the cross grain also, which is horizontal along the fabric, from selvedge edge to edge. Just don't place things crooked! | 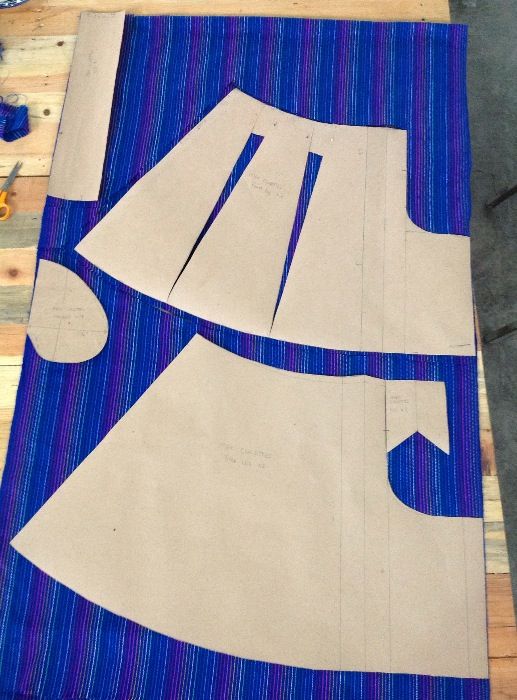 |
b) many fabrics come folded along the straight grain. This is great for some projects that don't have CF/CB seams because you can just place the CF/CB edge along that natural fold. However for this project, you should open the fabric, iron out the crease (or not if you are lazy like me), and fold in half along the cross grain. Your fabric is probably wider than mine, so you should be able to place your leg pieces higher up beside the waistband and use less length of fabric.
c) you can used the finished selvedge edge to your advantage... it is a naturally finished and straight edge on most fabrics, perfect to use on straight pattern edges. See how the legs of my pieces are against the edge of the fabric... I won't have to cut there, or do any extra sewing to prevent fraying! Great for me, since I don't have a machine at the moment. Not all fabrics have a clean edge there though so check yours out first.
d) The WB (waistband) is a little different, it usually follows the straight grain horizontally, opposite of the rest of the pieces. Remember it has a folded edge. Don't wait until the end to place your WB or you may end up having to make it in pieces if you don't have enough fabric! The folded edge of my fabric is at the top, where you can see I have placed my WB. Again, I am using the selvedge edge here, along the long side of the WB.
e) you need 4 pocket pieces, so you will have to place that pattern piece again after cutting. If your fabric is thick, I would recommend using a lighter weight fabric for the pockets.
STEP 4) Cut Out The Pieces
Once you have positioned your pattern pieces, pin in place and cut the fabric around them. You can also draw around them in chalk or ink and cut the fabric following your drawn lines. Remember to use your pocket pattern twice to get 4 pieces.
Clip a tiny notch in your fabric at every marked notch, and at the pleat fold lines. Your clips should be well within the 3/8" seam allowance or you will have holes in your culottes!
Clip a tiny notch in your fabric at every marked notch, and at the pleat fold lines. Your clips should be well within the 3/8" seam allowance or you will have holes in your culottes!

Here, I am clipping the top notch for the pocket placement.
Pro Tip - keep your paper pieces pinned to your fabric pieces until you are ready to start sewing! It is easy to get similar pieces mixed up, so this practice will help keep them organized.
STEP 5) Trim the Fly
STEP 3) Cut one of the fly pieces in half, because it does not need to be doubled. You should cut the one on the wearer's right side. Cut it along the center line. Discard that piece.

Now you are ready to start sewing! Stay tuned for that tutorial, coming up this week!
If you want to be notified right away when part 3 is posted, and want to stay informed about whatever else I may be getting into (I try to only post the headiest sh*t), like the DesdeLejos Facebook group and/or sign up for blog updates right to your email! Use the form in the sidebar to subscribe!
Ask any questions or leave feedback in the comments below. I hope you find these tutorials clear and informative. And mostly, I hope you have fun!