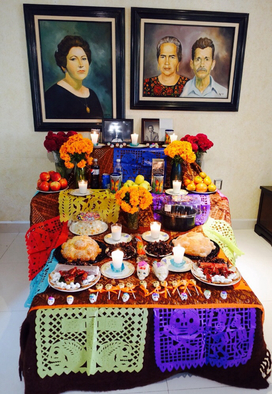
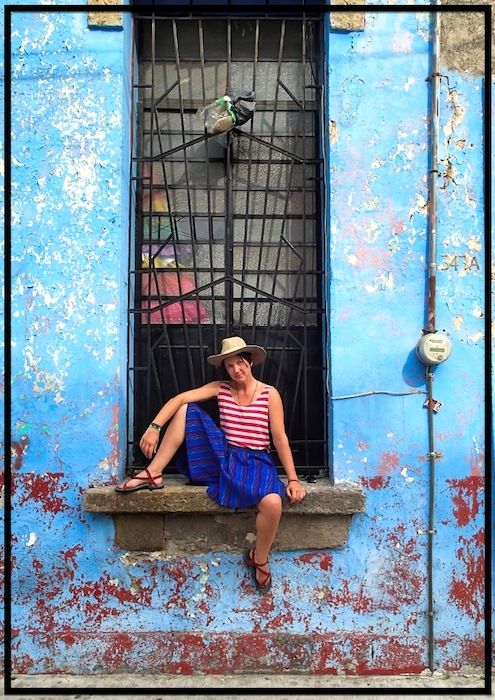
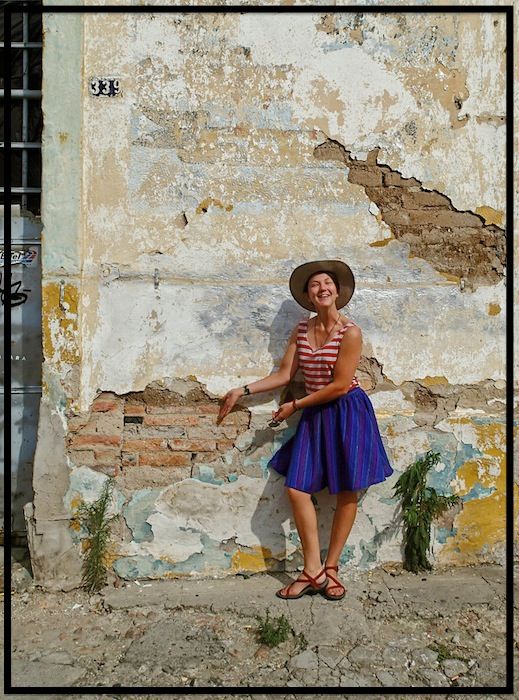
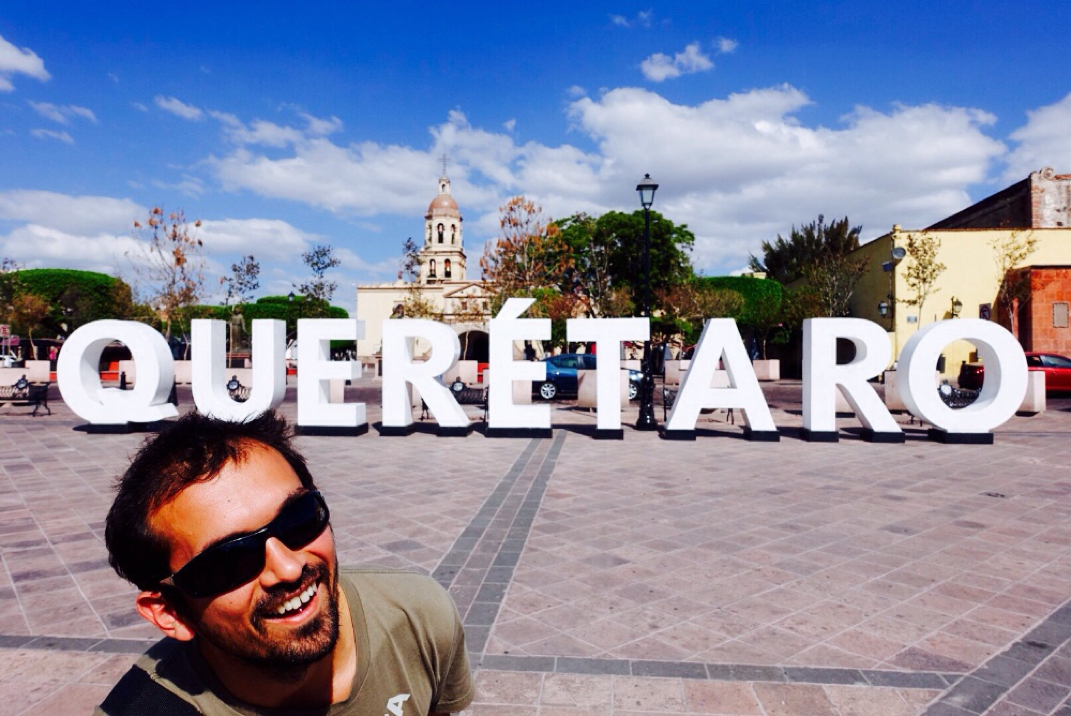
One of the drawbacks of long term travel is that you sometimes forget to be a tourist. When travel becomes your life, not your vacation, the excitement of seeing new places fades a little bit and every new place is just another home town to you, one in which you have to take care of life maintenance. This is especially true when cycle touring. Our city visits become a time to enjoy sitting still, eating well, and being clean between all those sometimes grueling days on the open road. It is great to treat each new city like home, feeling like we "live" there as soon as we arrive, but we are perhaps depriving ourselves of some of the tourist part of travel that made our previous shorter vacations so enriching. Lewis and I always explore a bit on our own terms, but in some places that's not enough. Mexico City is huge and has so much to offer. We cannot just rely on our own wanderings to find it. After spending our first week here "living" (ie, catching up on internet stuff, updating the budget, doing photo maintenance, working on the bikes, walking around the neighborhood looking for a place to eat, exercising, cooking at home, getting haircuts, going to a bar to see some music on a Friday night, and a bit of laying about the apartment - you know, stuff you would do in your home town - I finally got the notion to actually see some stuff. I curbed my pride and went to the Lonely Planet website and looked at their top suggestions for must-sees in Mexico City. There I found that, well what do you know, there is a lot here that I am interested in! By harnessing Lewis's mapping expertise and my time organizational prowess, next week is scheduled and chock full of museum visits, excursions, bike rides, neighborhood walks and more. We even have a day off in the mix, to do more internetting and relaxing and to tidy up any final bits of life maintenance before it's time to hit the road. I am a visual person so it is a relief to me to have some actions plotted on my calendar. Next week we get to live here AND be tourists. Yay!
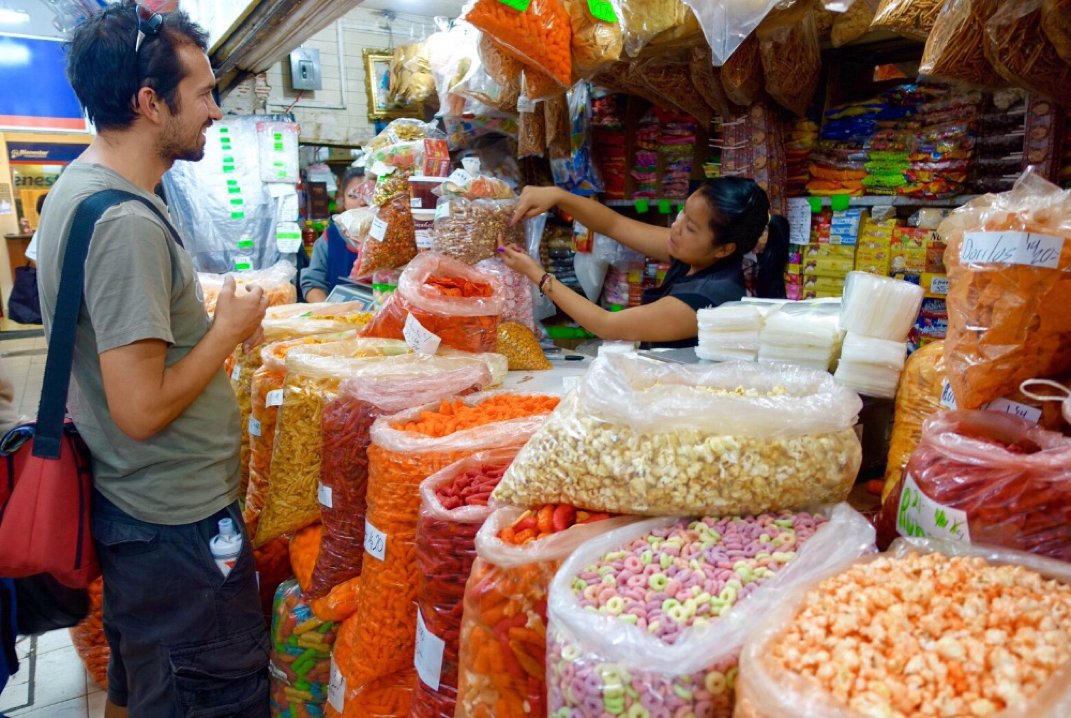
 
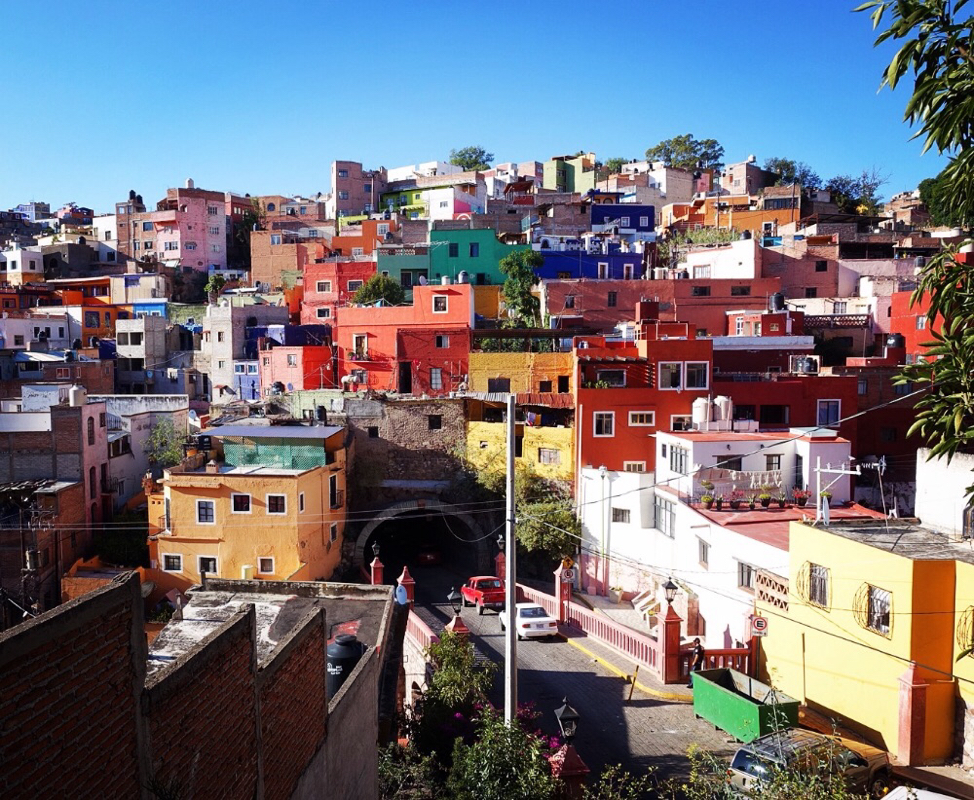
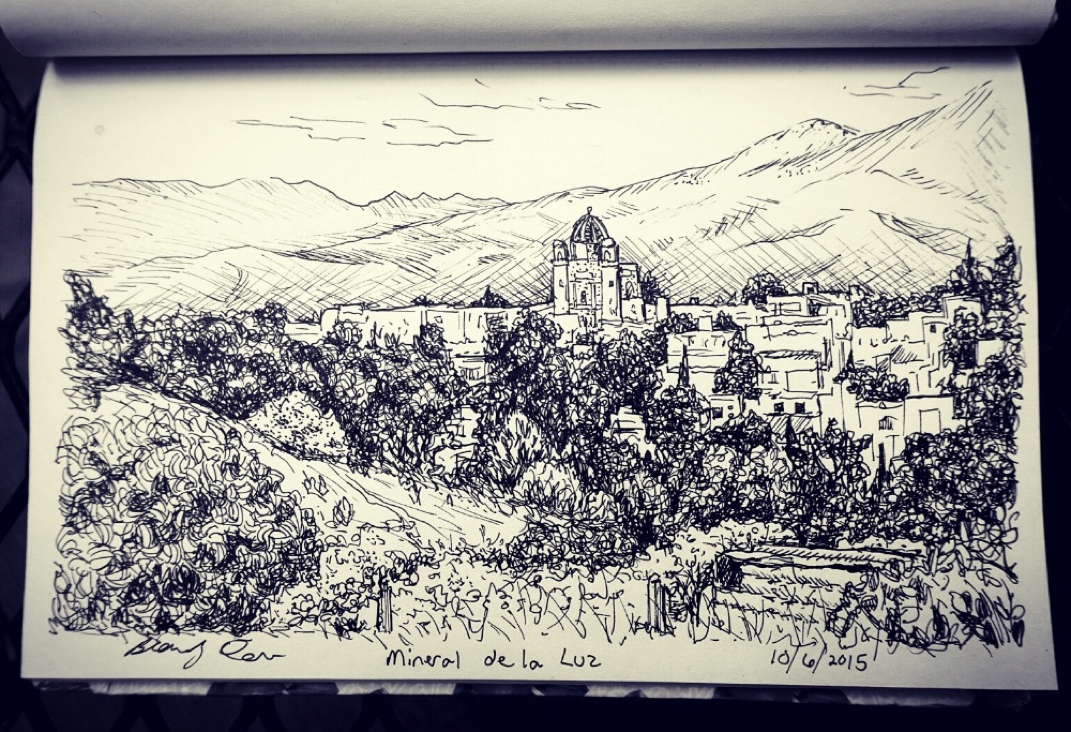
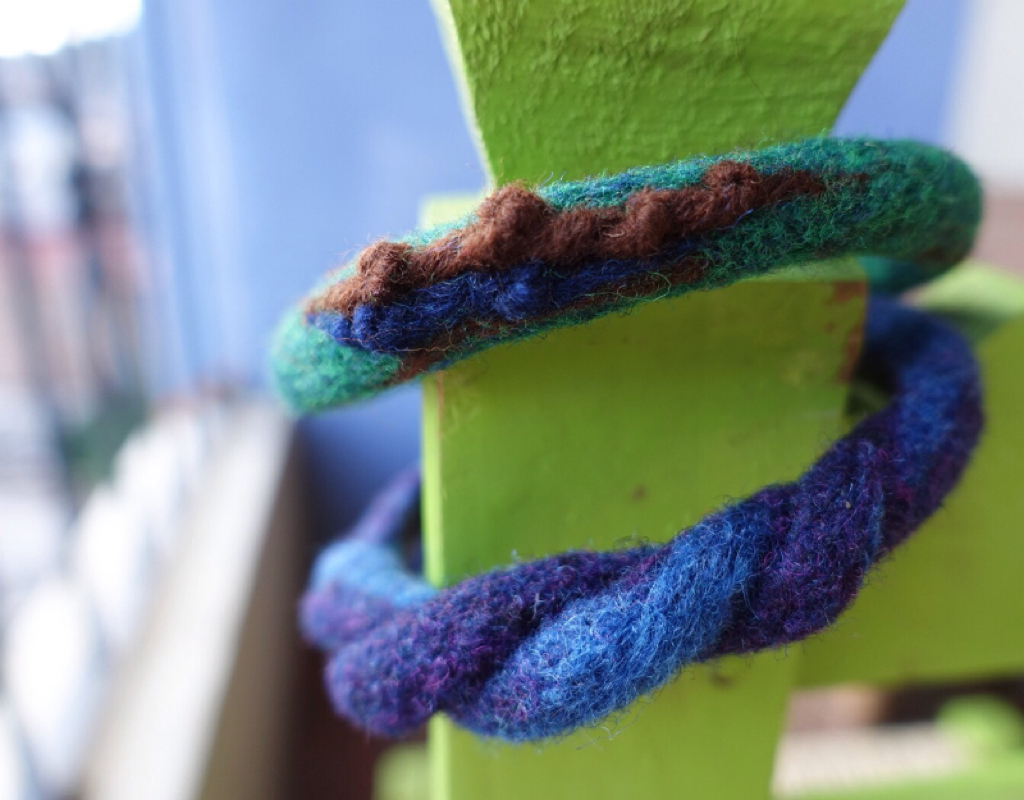
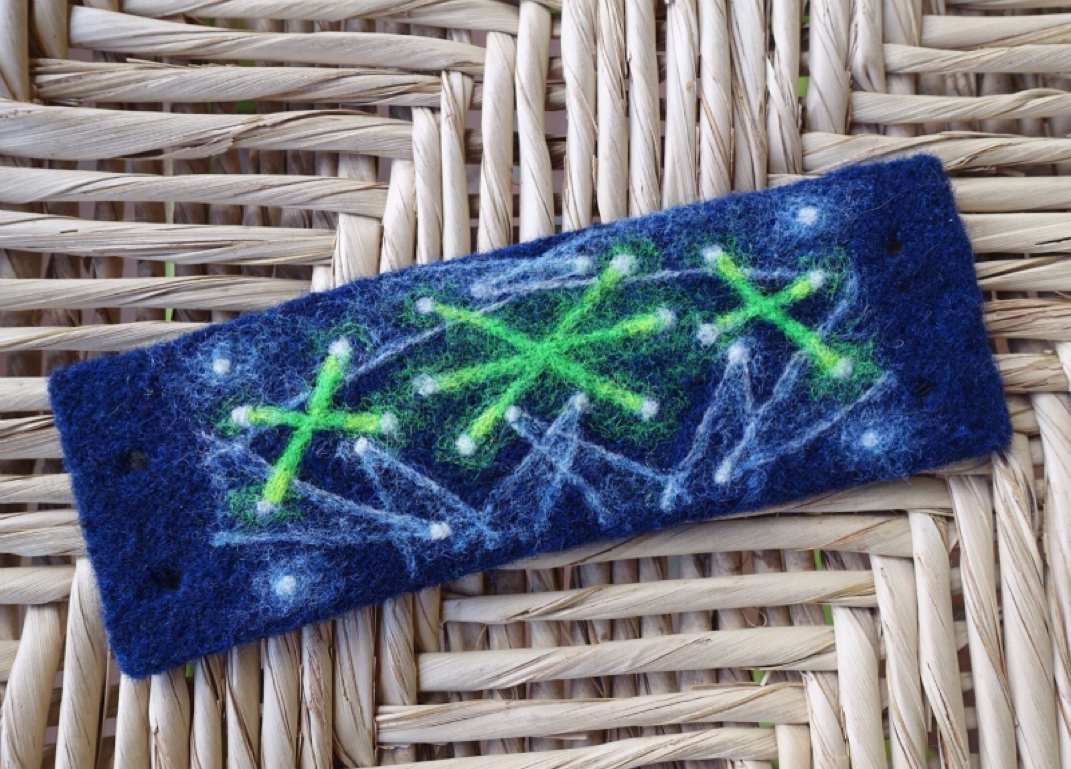
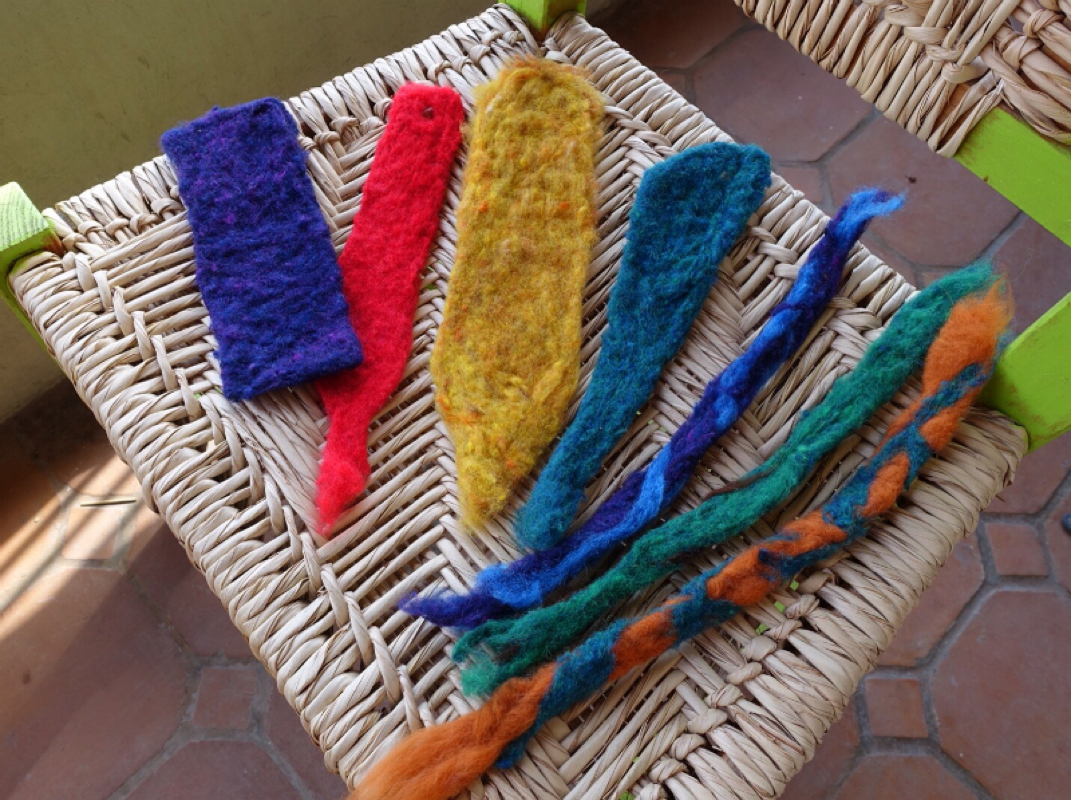
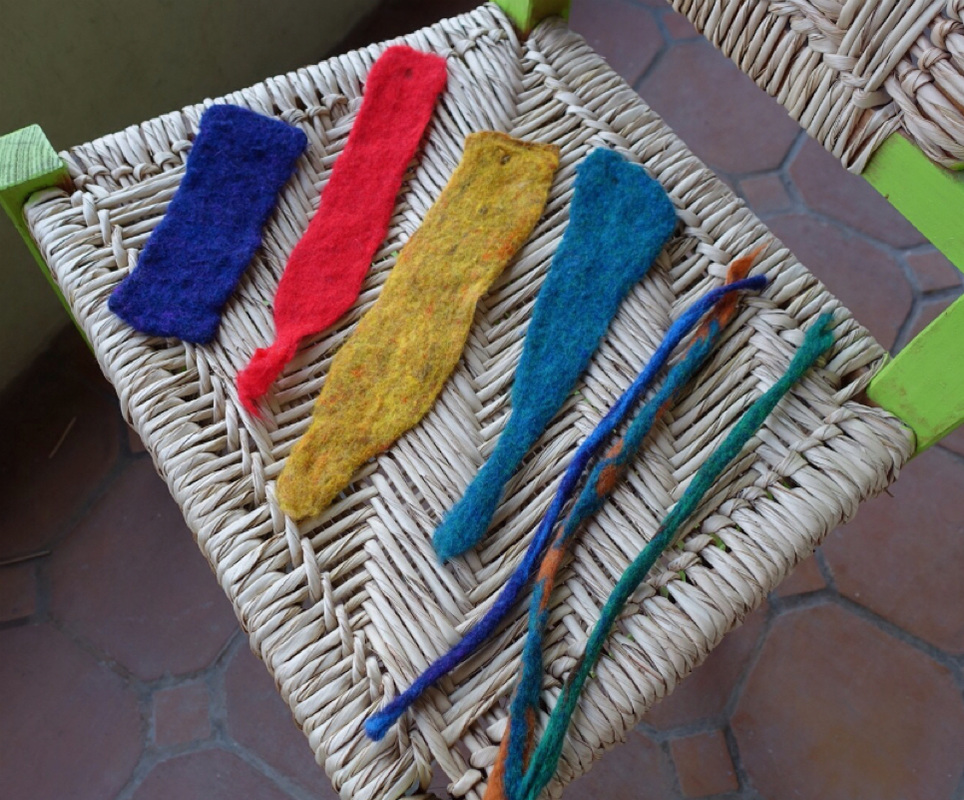
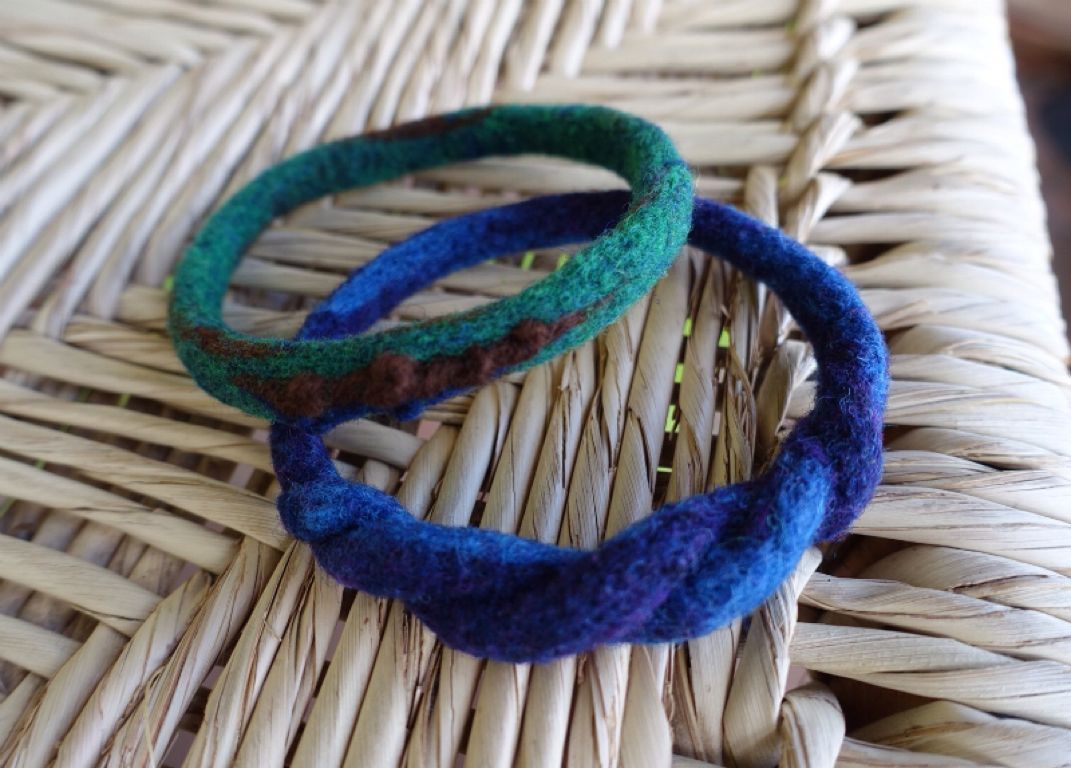
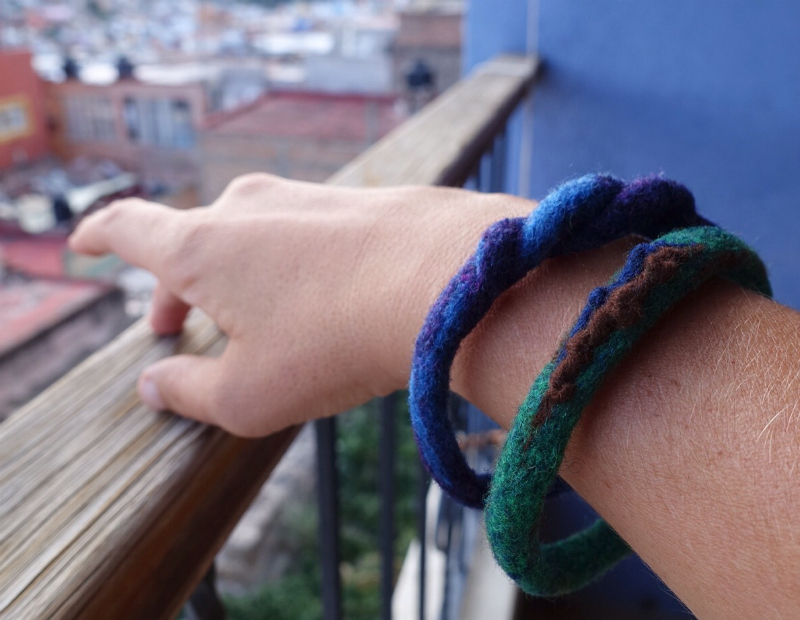
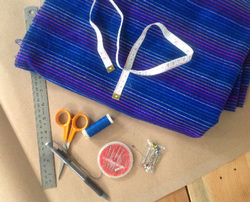
Now that I feel some organization in my life, my creative juices are starting to flow. I am visualizing a needle felted bracelet depicting a colorful scene of Guanajuato. I am starting it this evening, and will make a little project pack to have with me through out our touristing next week, so I can work on it in our down time. I am exited to get started!
0 Comments
After an adventurous couple of weeks touring the Sierra Gorda, Lewis and I jumped on a bus in Jalpan and were Mexico City bound. There are many reasons we decided to take a bus rather than cycle to the City, but it still hurt a little to finally break our continuous line, one we have kept in tact since Las Vegas (well, except for a 50 mile bus break due to bike mal-function, but that was just a minor blip. Details, details). We arrived in DF (a common short for Mexico, District Federal... kinda like saying "DC" for Washington, District of Columbia) on Satuday afternoon at the central bus terminal, which looks a lot like small but modern airport. Our host Ismael picked us up, thankfully, so we did not have to ride the 8 miles through unknown DF streets to his place in the center. Being one of the largest cities in the world (Wiki ranks it 7th largest in metro area, placing Tokyo 1st and New York 12th, for reference), we had heard some parts could be a nightmare to ride. Ismael is somewhat of an old friend to Lewis, and was actually his first Couchsurfing host when Lewis visited Mexico back in 2006. Lewis jokes about how bad his Spanish was back then, and how bad was Ismael's English. Things have certainly improved on both sides, but just for fun Ismael has complicated matters by living in a home full of French transplants, including his girlfriend, so French is the dominant language of the house. With all of the languages flying around, I feel like I am back in NY!
A long while since my last post! It's been a whirlwind summer of music, family, friends, and traveling all across the USA. While it really was a great time, I am excited to be back in Mexico, preparing for our next leg of the bicycle tour. There is much I would like to share from the last three months, and I am sure I will (so many blog posts brewing in my head!), but for this post I am going to jump right back into what is relevant to me right now. Mexico! As some of you know, I just joined Instagram (BrewisTravels) and have been posting approximately a photo a day. While I haven't quite wrapped my head around the total usefulness of Instagram yet, I do like how it encourages me to be more timely in what I share, and to share only what I think is beautiful or interesting to those I am sharing with. Last weekend I captured some lovely photos during a day trip around the countryside of Guanajuato, and having fresh in my mind the United States' slightly (or greatly) skewed vision of what Mexico is like, I decided to share some of those photos, specifically those of the charming little pueblos in the area, each beautifully photogenic in their surroundings. But to be honest, well this is not. Sure, it is showing much of what Americans don't imagine when they think of Mexico. But it is not truthful to present it as all sunshine and picturesque churches in lush valleys. I will probably always tend to lean towards the beautiful, as it is my nature, but in this post I want to show a little more.
It has a been over a year since my husband Lewis and I started traveling. Over a year since we quit our comfortable jobs and left the great city of New York indefinitely, chasing eternal summer with our bicycles. It has really been an eye-opening journey, and I have been thinking a lot about it since the first anniversary has passed. I wanted to share some of my thoughts with you. 1 ) IT IS NOT AS ROMANTIC AS EXPECTED...even with low expectations.
I am no noob when it comes to travel, or to life in general. I know high expectations tend to spoil the party. I also knew before we started that there would be hard times both on the bicycle and off. Yet still I couldn't help but dream... with over a year to plan and wait for "the big trip" to begin, how could I not? I dreamed of all the adventures we would have, all the amazing people we would meet. I also visualized the way I would change, the kind of person I would become. I imagined I would become more cultured, more textured, that I would be more outgoing and friendly with a deeper understanding of the world. I thought I would become more badass too, and perhaps a little crazy, but interesting. It brings me to the same lesson I have learned many times before: it is all just life, and I am living it. Here's the thing, I knew I loved to travel but - big BUT - I had never traveled for more than a month at a time, and usually much less. That is what you call a "vacation". A holiday, an exciting week or two where you get away from it all and SEE THE WORLD. A break from life. Long term travel is life, with the same hardships, the same mundane chores and the same low points where you are just too tired to do anything. If we stay in one place for a while, we see far less of it's attractions than we would if we had flown there on vacation. One key difference though is that in working life your time is organized for you, for better or worse, and you have a steady flow of income. In this traveling life, we are always thinking about how to optimize our time (yet still wasting a lot of it), and we are always counting pennies and saying "no" to many things that would have been acceptable to indulge in on a week-long excursion. But the point is, it is OUR time. All of it. Time is so much more valuable to us than money. Time is not replaceable. Since arriving in Guanajuato, I have been felting like crazy in preparation for summer. I plan to have a nice little collection of things to sell at the concerts and music festivals we are attending during our three months back in the States, and felted bracelets are going to be a major part of that. I love needle felting, and it feels good to be creating with wool again! Since it has been my obsession for the last few days, I thought I would share some of the progress with you. I spent over 3 days working on my first "Light Show" bracelet! I have to work faster than that if I want to have a collection. This piece was created almost entirely by needle felting, with just some minor wet felting to tighten things up. Needle felting is the process of turning wool fibers into felt by stabbing the wool with a needle thousands of times. The needle has tiny barbs or notches on the tip that grab hairs and lock them together. Needless to say, it is a long process. I decided to try a different method for my next bracelets. Pre-shaping the WoolFirst I selected some colors and thought a bit about the shape and plan of several more bracelets. I layered the wool and lightly needle felted it together, just a few pokes, to hold the shape. This is in preparation for another process called wet felting. Wet felting is supposed to shrink the shapes quite a bit, so I made them larger than I want the final outcome to be. Wet felting is a more traditional form of felting in which you rub the wool vigorously with soap and hot water. The soap and hot water cause the scales of the hairs to open up, and the rubbing pushes and tightens them into each other. Then you rinse in cold water to close the scales and lock the wool into felt. Wet felting all of these shapes took about an hour. Then you have to wait for them to completely dry before continuing to touch up the shape and add detail with the needle. Finishing TouchesAfter the shaped dried over-night, I was ready to work on the details! I started with two of the bangles. I really like how they turned out. I didn't know exactly how I was going to detail them, but they soon told me what they wanted to be. That is one thing I really love about felting… as you work, the wool often evolves naturally into beautiful things, if you don't fight it and let it inspire you. And Just For Fun...After a month in Cuba, we have returned to Mexico with new perspective (I will write more on this later) and a wealth of photos, even though I could not get my upgraded camera in time for the trip. Luckily the sights of Cuba lend themselves to beautiful photography, no matter the equipment! I returned to Mexico earlier this week eager to get to work on the images, especially the hundreds of images of antique automobiles. 60+ photos made the cut… here I present my favorites! Most of the cars were in poor condition from years of use. New cars were unavailable to Cubans for decades, forcing them to continuously repair what they had. We were told there were very few original parts left in these old relics, and many Cubans had to be creative to keep them running. For instance, we heard of pieces of old shoes being used as belts! If you know the make and model of any of these, let me know in the comments below!
See more of my favorite photos in the Cars Trucks Buses photography page, or see the whole collection of Cuba Motos on Flickr. Welcome to the 3rd and final part of the DIY Culottes tutorial! See Part 1 - Drafting the Pattern here, and Part 2 - Cutting here. In this post we get into the real meat of the project, sewing it all together! Lets get started! STEP 1) Gather SuppliesToday you will need: -paper pattern pieces (for reference) -fabric pieces -scissors -iron -pins -sewing machine -needle -thread -button or other closure of your choice (see Step 10 for discussion) STEP 2) Attach PocketsAlign each pocket piece with each leg piece at the side seam. The pocket edges should overlap the pocket placement notches by ⅜" on each side (seam allowance). Pin in place, right sides together. Stitch in place ⅜" from edge. (From here on, all stitching will occur ⅜" from edge unless otherwise noted.) Clean finish the seam allowance edges from the bottom of the pocket to the waist with overlock or zigzag. No need to clean finish below the pocket, as you will be doing that later. After stitching, open the pocket away from the leg and press with your iron.
Welcome to the 2nd part of a 3-part tutorial on making your own culottes from scratch! See Part 1 - Drafting the Pattern here. This post will discuss choosing the appropriate fabric for the project, and how to lay your pattern pieces and cut the fabric. Lets get started! Step 1) Choose your fabricThe best fabric for these culottes is a mid to light weight woven that has a nice drape to it. If it is wrinkle resistant, even better. My fabric is not, but that's ok. Give the fabric a shake… does it move and flow nicely like a flag in the breeze? Good. Does it hang stiffly or make a crinkling noise? Not as good. While you could use fabric like this, it will make your culottes rigid and tent out more. When choosing your fabric, think more like bed sheets, less like blanket… more like blouse, less like jeans. You can also use a knit like jersey (what T-shirts are made out of), but I would steer away from anything with spandex because it is difficult to manage with a home machine. Rayon jersey would be perfect. You have to be careful when sewing a knit because it wants to stretch while you are sewing, but a great benefit is that you don't have to finish any seam allowances with overlock or zigzag because it won't fray! A word about prints. Narrow stripes, or all over prints OK. Wide stripes and directional prints (prints that have a clear upside) are not recommended. To figure out how much you need, review the following steps for laying the pattern out. Then take your pattern with you to the store. Before they cut the fabric for you, lay out your pattern pieces. Fabrics come in different widths so it is very difficult to figure this out before you see it. Don't be shy. The employees at the fabric store are used to creative-types with a need to visualize everything spending hours in the store pulling and draping and laying out fabrics. They understand your need to get it right and will gladly help. When in doubt, buy an extra yard or two. While at the store, you might as well go ahead and pick up the skirt closure you want (a button and cord for a loop, or a hook and eye, or a large snap, or some cord for a tie). I'll talk more about this in the next post. Step 2) Gather SuppliesPre-ramble: For a little back story, check out my earlier post, New Projects in the Works. This tutorial is in 3 parts and is very thorough. While I would not say it is for beginners, I think just about anyone with a little time and patience could tackle it. All you need to know is here, hopefully clearly explained and with lots of pictures. I have even included pro tips that I picked up from working in the industry! Just take it one step at a time and have fun! PArt 1 - Drafting the Pattern I did a little online research and found a great draft over at Petit Main Sauvage. This is for a half-circle skirt with a pleat at the front and back, which hides the shorts and makes it look like a real skirt. They look great! I wanted a slightly different look so I made some changes... adding gathers to the waist, adding side seam pockets, adding 1/2" to the back waistline to account for booty :). f you don't want gathers or pockets, those steps are easy to ignore. Lets get started! STEP 1) Gather supplies. You will need: -pattern paper (newspaper, paper bags or any other scrap paper taped together will work. I am using brown packaging paper from a roll found at the Casa de Cyclista in Guadalajara, thanks guys!) -scissors -pencil -tape -tape measure or string -straight ruler, the longer the better -calculator I went to a street flea market yesterday to find more elements for my other projects, and I found an awesome purple spiral tie-dye Tshirt for only 15 pesos ($1). I thought, "hey... why not show a quick easy project that anyone can do, and right now?" So here is something to wet your whistle while you wait for the bigger tutorials to come! Got a favorite T-shirt but the neck is too tight to be comfortable? Maybe you have warn it so much that the pit stains are embarrassing? Or maybe you are just tired of it and want to try something new. Turn that old tee into a cool new tank top, no sewing required!
You need: -T-shirt (crew neck cotton or cotton blend tees work best. If you have a wide neck or deep Vneck, you may want to keep the original neck line and just cut out the sleeves) -ink pen -scissors -ruler -pins Taking scissors to a favorite tee could be a bit nerve-wracking. You may want to practice on a fugly tee you hate first. Who knows, it may go from fugly to fave! STEP 1) turn your tee inside out. This is so you can draw lines on it without them showing. STEP 2) draw the front neckline. I am going to use another favorite tank of mine to figure out how low I want it to be. You should use a tank top that is close to the same width as the tee. Lining up the straps with the edge of a table, I measure from the table edge to the front neck to get a measurement of 7". I want it to be a little lower, so I will add ½". |
AuthorBrandy Michelle Archives
March 2016
Categories
All
Where I Am NowSubscribe for blog updates!
Read more about our travels over at Rudiments of Gruel.
|